Enabling HTTPS on Elastic Beanstalk without a load balancer
- Feb 12, 2019
In this blog post, you’ll learn how to host a sample Python web app on Elastic Beanstalk, using HTTPS, without a load balancer.
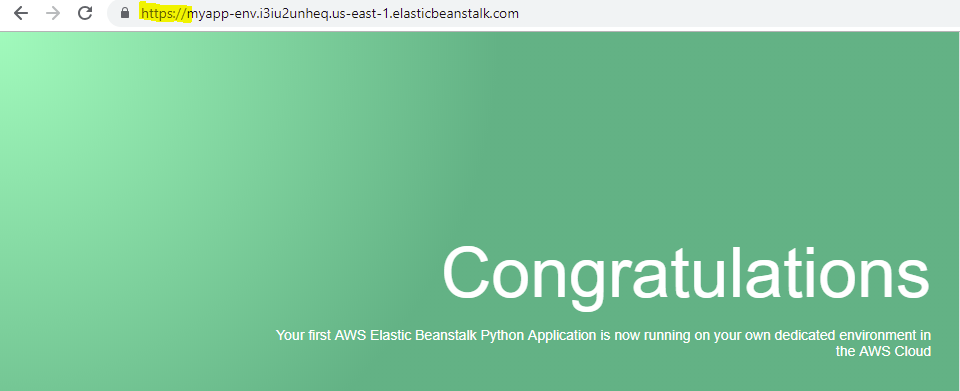
After following the steps in this blog post, you should end up with something that looks like the following image:
Why might you want to enable HTTPS on Elastic Beanstalk without a load balancer?
The recommended way to enable HTTPS in Elastic Beanstalk is to use one of AWS’s load balancers such as the Application Load Balancer (ALB) which supports autoscaling, fault tolerance, and other things.
Using an AWS ALB costs a minimum of about $18 per month, on top of any other charges you currently have, such as $5 for the t2.micro instance that you may be running your prototype on.
If you’re only planning on using a single EC2 instance in Elastic Beanstalk for your prototype, and don’t currently want the benefits of an ALB (fault tolerance, auto-scaling, etc), but do want the benefits of HTTPS (protection from interception, man-in-the-middle (MITM) attacks, etc), then this blog post will show you how.
An overview of the process
Although the blog post is fairly long, with a bunch of screenshots and troubleshooting advice, there are really only three steps:
- Create a new Elastic Beanstalk web app, setting Python as the platform, and selecting the Sample application.
- Generate a new sample app using the form in the Updating the Python sample app to enable HTTPS section below.
- Upload the new sample app to Elastic Beanstalk.
If you’re fairly experienced with Elastic Beanstalk, feel free to try the steps above yourself, otherwise, read on for a more detailed step-by-step guide.
1. Create a new Python App
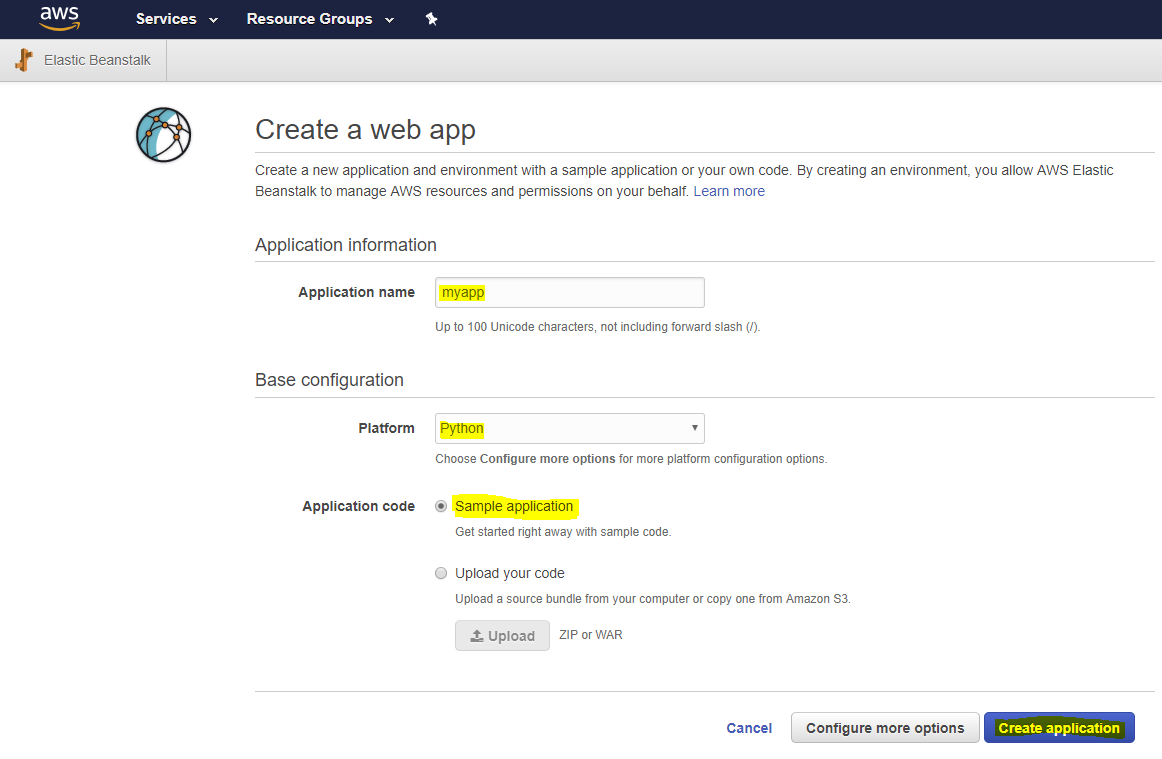
As shown in the screenshot below, create a new web app with Elastic Beanstalk
Name the application anything that you want. For this example, I’ve named it myapp.
For the Platform, select Python
For Application code, select Sample application - we’ll update this sample applicaton later with the necessary configuration to enable HTTPS.
Then click on Create application - there are lots of other settings in Configure more options, but for this post, let’s keep things simple and as close to the defaults as possible.
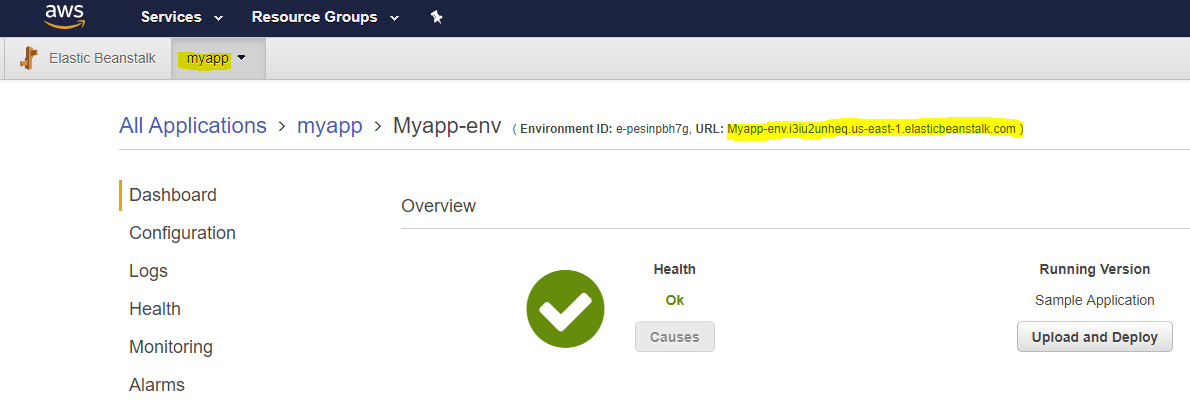
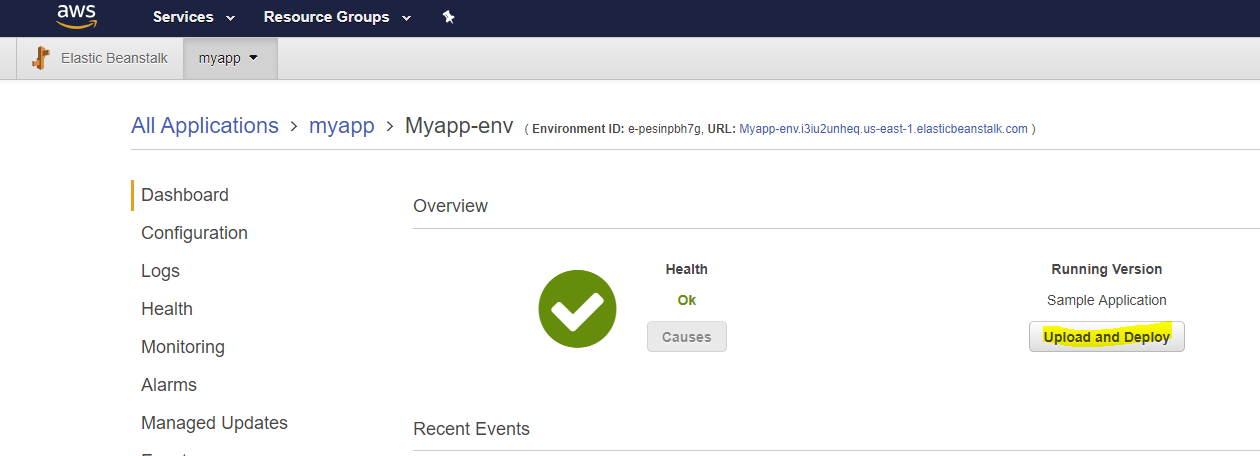
Once the application has finished being created, take note of the domain name. We’ll use this later.
For the sample application I created, the Elastic Beanstalk instance domain name is Myapp-env.i3iu2unheq.us-east-1.elasticbeanstalk.com. You can see it highlighted in the screenshot below.
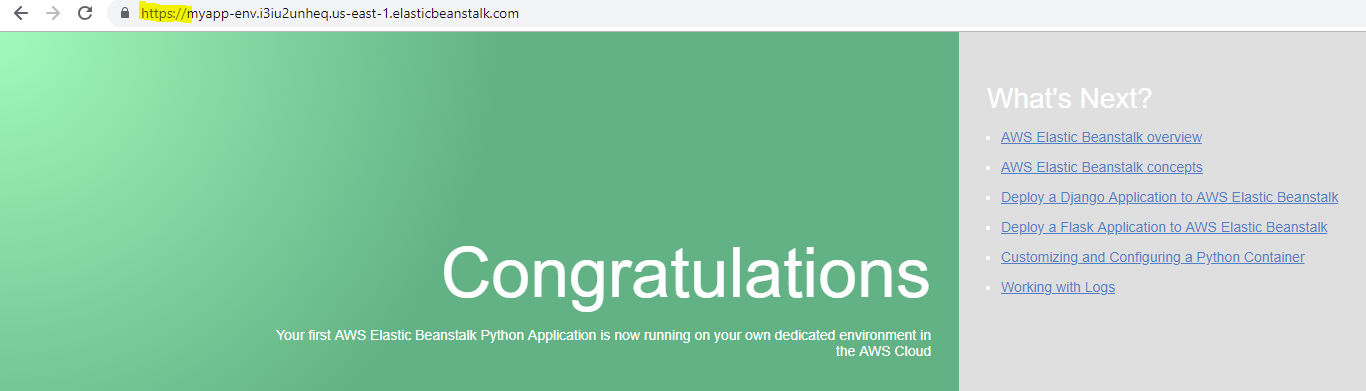
Click on your Elastic Beanstalk instance domain name to test that the site works. You should see something that looks like the following:
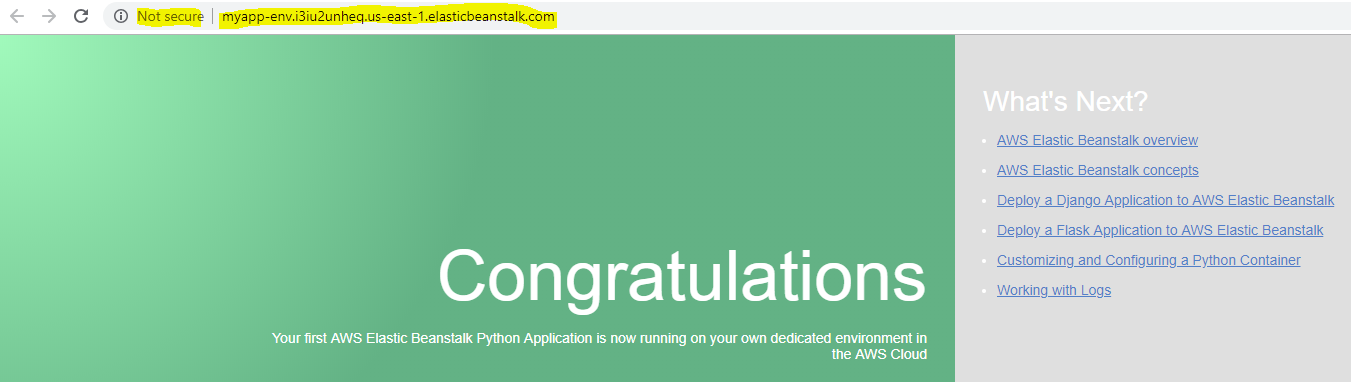
Note that the site is not using HTTPS, and the domain name matches the Elastic Beanstalk instance domain name in the Elastic Beanstalk dashboard.
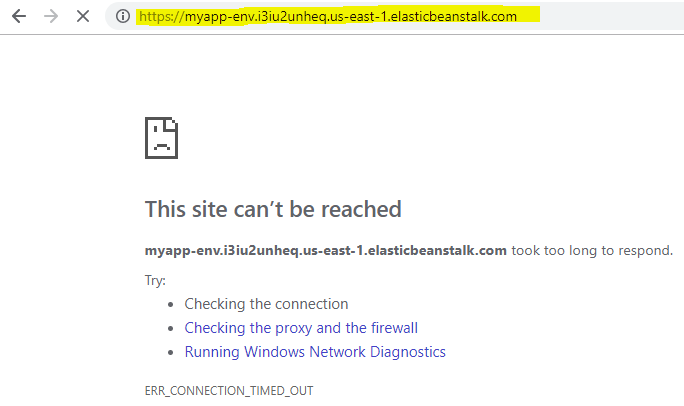
Now, attempt to access the site via HTTPS to confirm HTTPS isn’t already set up. You should see something that looks like the following:
Next up, we’re going to generate an updated sample app which will include the necessary configuration to enable HTTPS.
2. Updating the Python sample app to enable HTTPS
You’ll need the following:
- Your elastic beanstalk instance domain name - we’ll be enabling HTTPS for this domain name.
- Your email address - this is required by Let’s Encrypt to generate your SSL certificate. Your email address will not be saved, or used by me for any purpose other than generating the config file which will be used to enable HTTPS.
Use the form below to generate a new sample app which will contain everything that’s needed to enable HTTPS on your new Elastic Beanstalk instance.
After clicking on Generate Sample App, sample app will be a zip file. There will be two files within:
- application.py - the sample app which is exactly the same as the one that already exists on your new Elastic Beanstalk instance.
- .ebextensions/00_apache_ssl.config - the config file with the necessary commands to enable HTTPS on your Elastic Beanstalk instance.
This zip file is the package that we’ll upload to Elastic Beanstalk to enable HTTPS in our sample app.
3. Deploy to Elastic Beanstalk
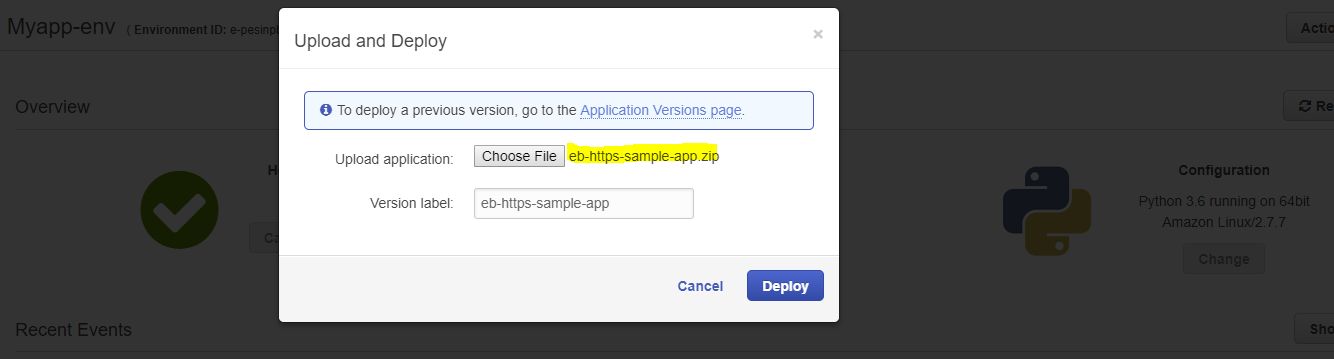
Now you’ve generated the Elastic Beanstalk sample app, eb-https-sample-app.zip, you’re ready to deploy.
In the Elastic Beanstalk dashboard, click Upload and Deploy
Then click Choose File, select eb-https-sample-app.zip, which was created earlier, and click Deploy.
If the configuration change worked correctly, it should now be possible to connect to your Elastic Beanstalk via HTTPS.
Things to keep in mind
The changes made by container_commands in 00_apache_ssl.config will remain, even if you roll back your application code.
If you want to roll back any changes made by container_commands, you’ll need to rebuild the Elastic Beanstalk instance.
Troubleshooting
If you get errors in deployment, you’ll need to log into the Elastic Beanstalk instance and start troubleshooting to figure out what’s causing the error.
To start the process, log into the Elastic Beanstalk instance via eb ssh
Run each of the commands in container_commands individually, to find out if any of the container commands have triggered the error.
Finally, run apachectl configtest to see if it’s the Apache config that’s causing the problem.
Please let me know in the comments below if this blog post needs to be updated.
The certbot –debug flag is currently required on Amazon Linux
If you remove the --debug flag, you might see this error in eb-commandprocessor.log or eb-activity.log:
Amazon Linux support is very experimental at present...
if you would like to work on improving it, please ensure you have backups
and then run this script again with the --debug flag!
Alternatively, you can install OS dependencies yourself and run this script
again with --no-bootstrap.

(ElasticBeanstalk::ExternalInvocationError)
At the time of writing, the --debug flag is required.
Domain names for the SSL certificate are limited to 64 characters
Your Elastic Beanstalk instance domain name must not be longer than 64 characters.
For example, while running the certbot command, you may get an error such as:
Error: urn:ietf:params:acme:error:malformed :: The request message was malformed :: Error finalizing order :: issuing precertificate: CN was longer than 64 bytes
You’ll need to shorten your Elastic Beanstalk instance domain name, so that it is shorter than 64 characters.
Where to next?
In this blog post, learned how to host a sample Python web app on Elastic Beanstalk, using HTTPS, without a load balancer.
Next, you might want to switch to Flask or Django.
To get you started, I’ve included some minimal sample code below.
Make sure you’ve already got HTTPS working on your Elastic Beanstalk before trying any of these samples.
A minimal Flask app
Upload a new zip file containing the following two files:
application.py:
from flask import Flask
application = Flask(__name__)

@application.route('/')
def hello_world():
    return 'Hello, World!'
requirements.txt:
flaskIf you reload your site, it should now look something like this:

A minimal Django app
Upload a new zip file containing the following two files:
application.py:
import sys

from django.conf import settings
from django.conf.urls import url
from django.core.management import execute_from_command_line
from django.core.wsgi import get_wsgi_application
from django.http import HttpResponse

settings.configure(
    DEBUG=True,
    ROOT_URLCONF=sys.modules[__name__],
)

def index(request):
    return HttpResponse('Hello from Django!')

urlpatterns = [
    url(r'^$', index),
]

application = get_wsgi_application()
requirements.txt:
djangoIf you reload your site, it should now look something like this:

Thanks for reading!
I hope you found this post useful. Do you have any questions? Are there any follow-up blog posts you’d like me to write relating to this? Feel free to leave any feedback in the comments below.